- The Start.
- The Slurp
- The Reaction
- Browser Profile / User Data Directory
- Running from a Custom Location
- Web Application
The Start.
For a while now I have been mentioning on social networks and to friends how and why I use something called a “Browser Profile” the main reason why is due to tracker cookies but also it helps me in maintaining and controlling my online presence.
We all know that many people like to block adverts on websites but many do not worry about cookies, I for one do not like the fact that websites can plant a single cookie on you computer which can then record the websites you visit, Facebook is one prolific website which loves to follow you all over the web and then use this gathered browsing info to create directed advertising when you use Facebook but it does not stop there.
The Slurp
Facebook can and do crawl/mine your actual browsing history, This is carried out by creating an account with them then agreeing to their terms and conditions you are allowing them to do this! But it get’s worse, They also create a “ghost” profile of you based on information gleand from your friends how use their apps and website. All the permissions given to the app on a mobile phone of your friends is allowing Facebook to profile everyone and it starts with your phone number.
The Reaction
So I use a separate browser profile specificity for Twitter and Facebook this way I ensure that the data about me that is can crawl/mine will only ever be from Facebook.com as will the browser history. Now when you first look into Browser Profiles and begin to use them you will need to change your browsing habits, for example if friend A shares a link to a website when I view it in my Facebook feed I don’t just click to view it I now right click and copy it to the clip board and then go to my “Normal” web browser instance and paste the URL in my address bar and visit the page. This way Facebook now has no idea I have visited the site and cannot in anyway use that website to create a targeted advert.
I know many will say “Why not just block cookies and use ghostery?” well I do use ghostery but Twitter and Facebook demand you have cookies enabled and as well as that if you use ghostery and have cookies deleted when your browser is closed you will still see targeted advertising in Facebook meaning their forced cookie is managing to store some data of where you have been and then using their apis and access methods when you see an amazon advert it will show what you last browsed within amazon. Yes I could just block the advert but what I am trying to achieve is a setup that blocks everything from these companies and also stops them looking at data I do not want them to see which is why Facebook decided to start to log the history from the browser itself so even when you block all the above Facebook can see your tracks still. So this method locks everything but impacts the experience and convenience we have grown accustomed to have.
One thing many say all the time is “Why would I want to do that! I love being able to easily access site shared by my friends…” I used to hear that all the time and mainly ended up with people stating it was pointless, waste of time, cumbersome etc but I am getting more and more people ask me how to stop/block tracking and keep privacy. So here goes one of a series of articles I’ll be posting here to help you block, separate even replace the web based services to enable you to keep using them but also retain some privacy.
Browser Profile / User Data Directory
The user data directory contains data specific to a given user. Some examples of this type of data are: history, bookmarks, and cookies.
(Note that in Windows, the profile name is included in the directory hierarchy.)
Default Locations
Windows XP
Google Chrome:
C:\Documents and Settings\%USERNAME%\Local Settings\Application Data\Google\Chrome\User Data\DefaultChromium:
C:\Documents and Settings\%USERNAME%\Local Settings\Application Data\Chromium\User Data\DefaultWindows 10 / 8 / 7 / Vista:
Google Chrome:
C:\Users\%USERNAME%\AppData\Local\Google\Chrome\User Data\DefaultChromium:
C:\Users\%USERNAME%\AppData\Local\Chromium\User Data\DefaultMac OS X
Google Chrome:
~/Library/Application Support/Google/Chrome/DefaultChromium:
~/Library/Application Support/Chromium/DefaultLinux
Google Chrome:
~/.config/google-chrome/DefaultChromium:
~/.config/chromium/Default
Chrome OS
/home/chronos/Running from a Custom Location
OK so this is the reason for this post run Google-Chrome or Chromium with a custom user data directory in order to run multiple instances at the same time.
Windows
To do this, add the –user-data-dir flag to chrome.exe, like this:
chrome.exe --user-data-dir=c:\fooHere are the full steps on how to make a new profile and get a shortcut for it:
Step 1: Open Windows Explorer and switch to Chrome’s User Data folder available at:
For Windows 10, 8, 7:
C:\Users\<username>\AppData\Local\Google\Chrome\User Data
For Windows XP:
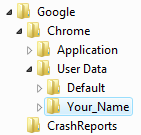
C:\Documents and Settings\<username>\Local Settings\Application Data\Google\Chrome\User Data Step 2: While inside Windows Explorer, select the subfolder called “default” and make a copy of that folder inside the same “User Data” folder of Chrome. Rename that new folder copy to, say, Your_Name as shown in the screenshot.
Step 3: We will now reset this new “Your_Name” profile in Chrome to the factory defaults. Open “Command Prompt”, use the “cd” command to switch to the Chrome Application folder (where Chrome is installed) and run the following command:
chrome.exe --user-data-dir="..\User Data\Your_Name" -first-runStep 4: Your new user profile in Chrome is ready for use. To run Google Chrome using this profile instead of the default profile, let’s create a shortcut. Right click anywhere on the desktop, choose New -> Shortcut and type the following in the location box:
For Windows 10,8,7:
C:\Users\<user>\AppData\Local\Google\Chrome\Application\chrome.exe --user-data-dir="..\User Data\Your_Name"

For Windows XP:
C:\Documents and Settings\<user>\Local Settings\Application Data\Google\Chrome\Application\chrome.exe --user-data-dir="..\User Data\Your_Name"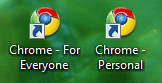
Give this shortcut a name, change the shortcut icon to anything you want or just keep it as Chrome and you’re done.
Mac OS X
To achieve the same thing in Mac OS X take a little bit more work but still here are the steps:
Step 1: Open AppleScript Script Editor (either in Applications/Utilities or Applications/AppleScript)
Enter this:
Chromium
do shell script "/Applications/Chromium.app/Contents/MacOS/Chromium -user-data-dir=/Users/$USER/Library/Application\\ Support/Chromium/Facebook > /dev/null >> and and"Google Chrome
do shell script "/Applications/Google\\ Chrome.app/Contents/MacOS/Google\\ Chrome -user-data-dir=/Users/$USER/Library/Application\\ Support/Google/Chrome/Facebook > /dev/null >> and and"(If you did not install Chromium in the default location, modify the script as appropriate.)
Step 2: Save the script in your Applications directory with the file format Application and a memorable name like Facebook-webapp.
Now close the Script Editor and find your newly created application and run it. Running this application will open another Chromium instance pointing to your new profile.
If you want this application to have the same icon as Chromium, then select the Chromium application and type command+i to open the info dialog. Select the icon at the top left of the info dialog and you will see a blue highlight around the icon. Copy the icon using command+c. Now open the info dialog for the new script application using command+i. Select the icon at the top left and paste the copied icon using command+v.
Linux
To do this, add the –user-data-dir flag to chrome, like this:
chrome --user-data-dir=/path/to/foo
As explained here chromium , the default directory is located at:
Google Chrome: ~/.config/google-chrome/Default
Chromium: ~/.config/chromium/Default
Step 1: Open a terminal and create a new directory for your second profile. For instance:
mkdir ~/.config/google-chrome/workStep 2: Open Google Chrome with the switch:
google-chrome --user-data='~/.config/google-chrome/work'If this is a profile you’ll be using often, you can also create a menu entry under Applications>Internet “Chrome” or “Work”, maybe? if you can’t edit the menu directly you can find all the .desktop files here:
System:
/usr/share/applications
User:
~/.local/share/applications
All you would do then is find the google-chrome.desktop file and copy it then edit it then save as a different filename and if you did it correctly just refresh your menu and there will be your new application shortcut.
iPad
Unfortunately if most of your web usage occurs on an iPad then you will face issues in setting up multiple profiles mainly because there is no facility to copy/edit application shortcuts. This is due to the fact that iPads just run iOS.
Android
Much the same as iOS unfortunately again you will not be able to run google chrome with multiple profiles because again you have no way to edit/copy shortcuts, I have tried with a rooted android phone and a terminal emulator but the issue is compounded slightly because every android app runs in a google version of a kernel container which means when you use a terminal to edit any part of the app that part is then ignored as you changed the permissions for it!
Web Application
For a while now I have been running popular websites within their own window with no menu, bookmark or navigation bars. This way the website fills the entire window but is not full screen.
To Start you need to open your favourite site in a tab.
Then in another tab open the apps window chrome://apps/
Now go back to the previous tab and in the navigation bar (or Omni-box as google call it!) you see the little icon next to the URL, if you click, hold and drag that icon to the apps tab then drop it between any 2 icon already present on the app window.
You should now see either a capital letter or the icon for the website, right click on that nice big icon you just made and select “Open as window”, there is another option called “Create shortcuts” this will put an icon for this “App” on your desktop and start menu in windows.
Here is a short vid clip that shows you what to do if you find watching easier than reading about it.
And that concludes this post, Have fun.